-
- iTransfer Platinum Mac

- iPhone Transfer Platinum Mac
- iPad Mate Platinum Mac

- PodWorks Platinum Mac
- iPhone Ringtone Maker Mac
- iPhone Transfer Plus Mac

- iPad Mate for Mac
- PodWorks for Mac
- iPhone Contacts Transfer Mac
- DVD to Video for Mac

- DVD to MP4 Converter for Mac
- DVD to iPhone Converter for Mac
- Blu-ray to Video Converter for Mac

- DVD to iPad Converter for Mac
- DVD to Audio Converter for Mac
- DVD Creator for Mac
- Video Converter for Mac

- MP4 Converter for Mac
- 3D Movie Converter Mac
- Video Editor 2 for Mac
- Audio Converter Pro Mac
- YouTube Video Converter for Mac

- Download YouTube Video for Mac

- YouTube HD Video Downloader Mac
- YouTube to iTunes Converter Mac

- YouTube to iPhone Converter Mac
- HEVC/H.265 Converter for Mac
- iTransfer Platinum Mac
- More
How to convert SWF video with ImTOO SWF Converter
The following guide will show you how to convert SWF videos from other popular video files with ImTOO SWF Converter step by step.
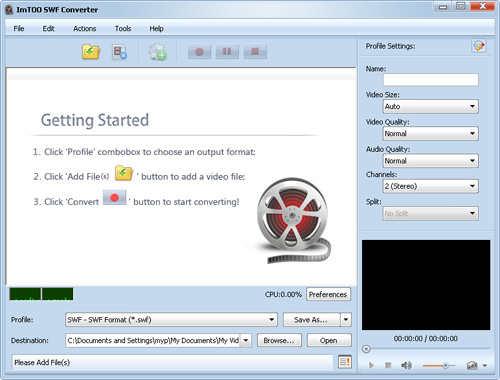
First, please download, install and run ImTOO SWF Converter. Then, the main window of the program appears as below.
Step 1: Add video files
Click "Add File(s)" button on the toolbar or "File > Add File(s)" to load the files you want to convert. Or click "Add Folder" to select the folder you want to add, then all the available files in the folder are loaded.
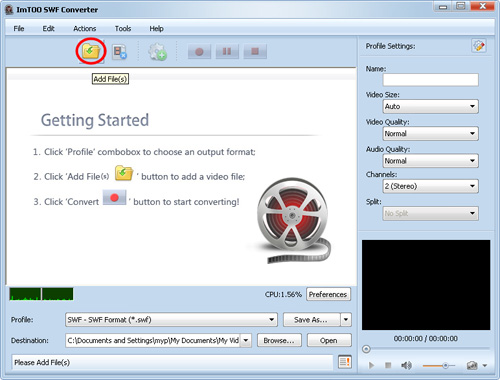
You can also use drag-and-drop to add one or multiple files directly.
Tips:
1. With the built-in player, you can preview the loaded file in the player at the right bottom. The player supports play, pause, stop, backward, and forward.
2. You can also use the "Snapshot" button in the player to capture the current frame and save it for collection.
3. Double-click the loaded file to view the file info in the "File Info" window that opens.
Step 2: Set the output format and folder
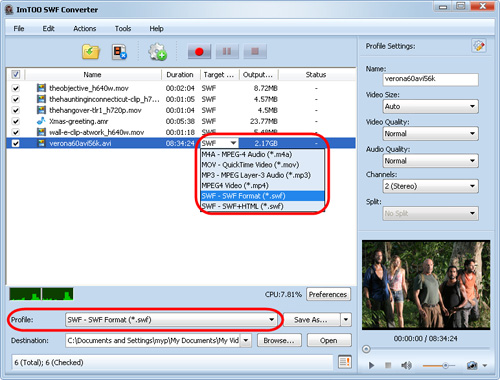
Select the output format in the "Profile" drop-down list, and specify the output directory at the bottom of the main interface.
If choosing "SWF+HTML" profile, you can create a HTML page with embedded SWF file to play it with the Internet browser directly.
If you want to do more with the video, just go ahead. Otherwise jump to Step 6 to complete the conversion directly.
Step 3: Set multiple profiles for the source file (optional)
Highlight the file and click the "Add Profile" button on the toolbar to add one extra profile below the selected file, and select output format from the "Profile" drop-down list. In this way, you can get several files with same content but different extension converted with just one click.

Step 4: Set output settings
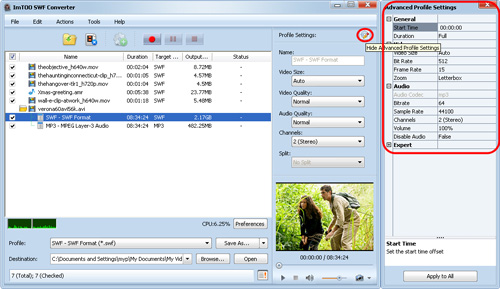
On the right general and advanced "Profile Settings" panels, you can adjust the output SWF file parameters, like Name, Video codec, resolution, bit rate, frame rate, video quality, audio quality, audio channel and so on.
Step 5: Customize the output file size (optional)
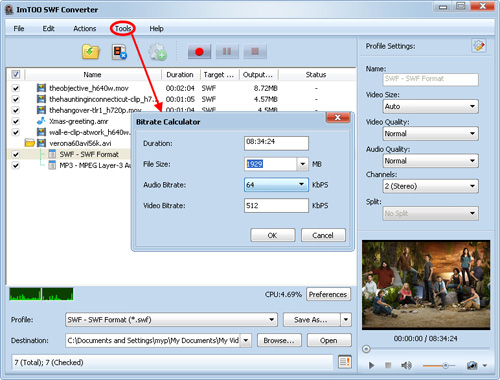
To customize the output SWF file size, highlight the source file, click "Tools > Bitrate Calculator", and type the file size you want in the "File Size" textbox, then the video bit rate will be auto-calculated directly. Click "OK" button, and the value you type will be shown in the "Output Size" column of the file list.
Step 6: Start the conversion
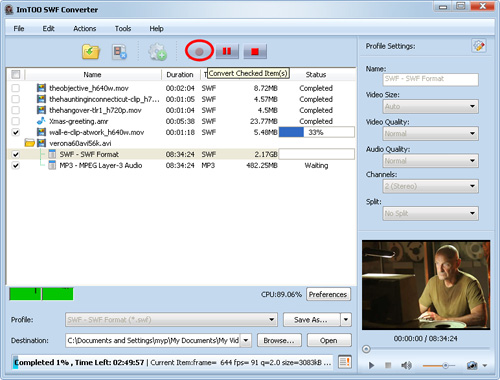
After all the above settings are OK, click "Convert" button to start converting your videos to SWF files in batches. You can pause, resume, or stop during the conversion process.
If the output SWF file exceeds 16000 frames (the frame limit on SWF file), This SWF Converter will auto-split it into several parts to avoid the halt during SWF file playback.


