-
- iTransfer Platinum Mac

- iPhone Transfer Platinum Mac
- iPad Mate Platinum Mac

- PodWorks Platinum Mac
- iPhone Ringtone Maker Mac
- iPhone Transfer Plus Mac

- iPad Mate for Mac
- PodWorks for Mac
- iPhone Contacts Transfer Mac
- DVD to Video for Mac

- DVD to MP4 Converter for Mac
- DVD to iPhone Converter for Mac
- Blu-ray to Video Converter for Mac

- DVD to iPad Converter for Mac
- DVD to Audio Converter for Mac
- DVD Creator for Mac
- Video Converter for Mac

- MP4 Converter for Mac
- 3D Movie Converter Mac
- Video Editor 2 for Mac
- Audio Converter Pro Mac
- YouTube Video Converter for Mac

- Download YouTube Video for Mac

- YouTube HD Video Downloader Mac
- YouTube to iTunes Converter Mac

- YouTube to iPhone Converter Mac
- HEVC/H.265 Converter for Mac
- iTransfer Platinum Mac
- More
ImTOO iPhone Ringtone Maker Guide
The guide will explain how to easily make your iPhone ringtone from any video/audio files with ImTOO iPhone Ringtone Maker. Firstly, download, install and launch the software.

Step 1: Load a video/audio file
Click the "Select file(s)" button on the toolbar to select the file you want to create ringtone in the dialog that pops up, then click "Open" button. You can see the audio waveform in the grid area.
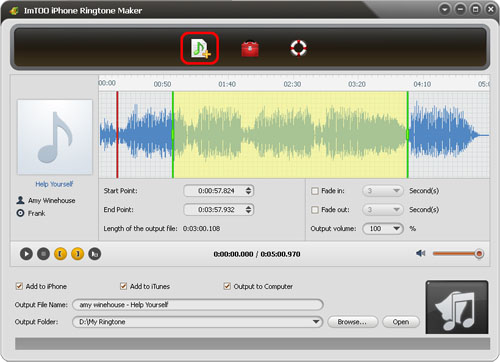
Step 2: Adjust the output settings
Enter the name in the "Output File Name" textbox or keep the original name, and click "Browse…" button on the right side of the "Output Folder" to choose a folder for saving the outputted ringtones.
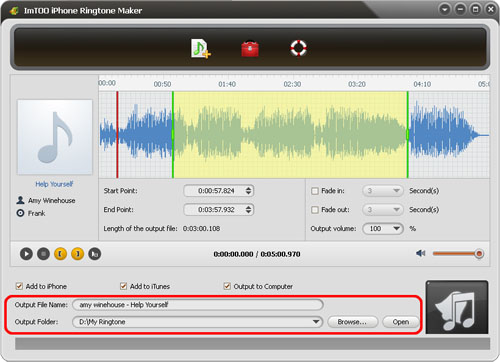
Tips: After making ringtone, you can click "Open" button to view the ringtone directly.
Step 3: Customize the ringtone (optional)
1. Extract a clip
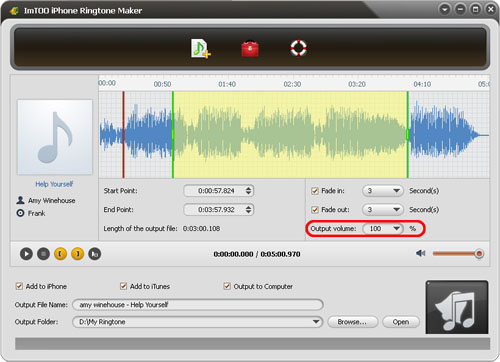
Click "Play" button to listen the music and find the part you want. Drag and drop the start & end line to get a music clip, or click "Set the current time as the start point" and " Set the current time as the end point " buttons to extract a clip, or type the start & end time directly in the corresponding text boxes.
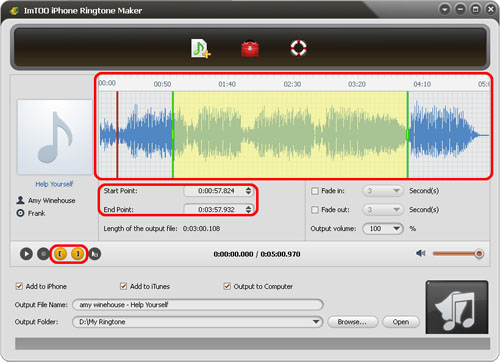
Tips: The red line is “current time” in the grid area, you can set the exact position of the red line according to actual need.
2. Add fade-in and fade-out effects
Check the "Fade in" and "Fade out" checkboxes, and set the fade-in and fade-out time according to your need.
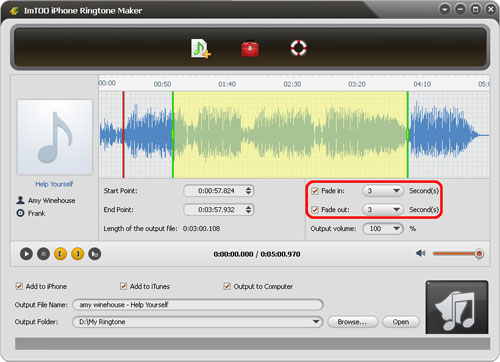
3. Adjust ringtone volume
Click “Output volume” drop-down button to set the ringtone volume freely.
Step 4: Adjust the file transfer settings
If you want, check "Add to iTunes" and "Add to iPhone" options to let the program upload the ringtone to iTunes and your iPhone directly after conversion.
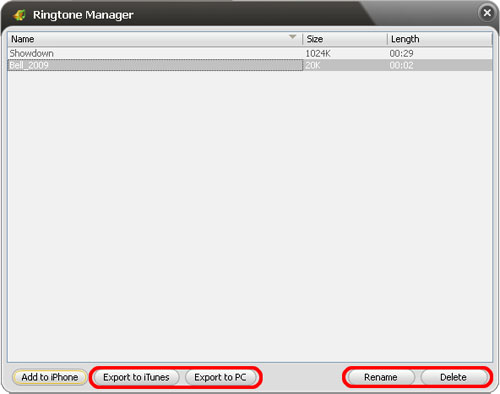
Click "Ringtone Manager" button on the toolbar to manage all the ringtones you uploaded to iPhone in the "Ringtone Manager" dialog that opens.

Choose an audio file in the file list, click “Export to iTunes” or “Export to PC” button to exporting files. You can also click “Rename” button to rename the audio file.
Step 5: Start making ringtone
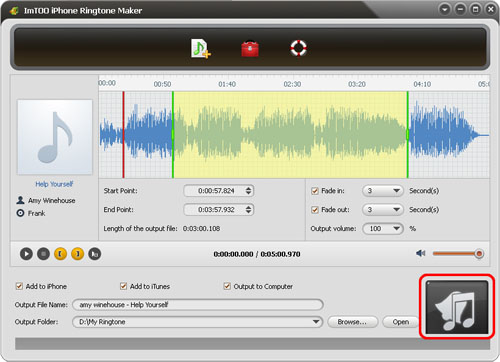
After all above are finished, click "Start Converting" button to start to make your own iPhone ringtone. You can check the converting process from the progress bar at the bottom. Just in a few minutes, you make your own iPhone ringtone from the loved music.
Related Tips:


